The Artillery Blog
Working with CoffeeScript: Sublime Text
 by Thibaut Despoulain
Working with CoffeeScript is a series of short blog posts about working with CoffeeScript every day and sharing the tips and tricks that we’ve learned.

Text editors have always been a big source of controversy. Here at Artillery, our team uses Vim, Atom, and Sublime Text. This article will focus on the latter, which I use on a daily basis. Below you’ll find some useful packages and tips to speed up your Sublime Text workflow while working with CoffeeScript.
Packages
Let’s assume that you have a working Sublime Text 3 setup with Package Control installed. If you’re a brand new user, or you haven’t installed Sublime yet, an excellent guide to getting things going is An essential guide to installing Sublime Text 3. Once you’re set up, installing a package is easy as:
Cmd/Ctrl+Shift+P- Install Package +
Enter - <package name> +
Enter
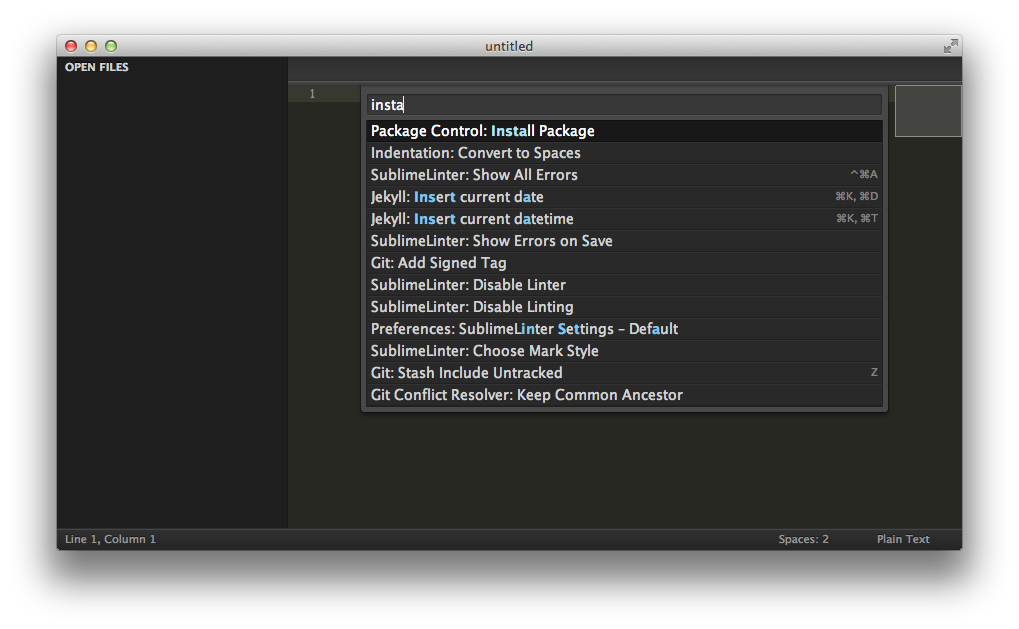
Packages can be browsed on the Package Control site. Here are some of the best for working with CoffeeScript.
Better CoffeeScript
- Package name: BetterCoffeeScript
- Link: https://sublime.wbond.net/packages/Better%20CoffeeScript
This is the basic package required to work with CoffeeScript. It adds syntax highlight schemes for .coffee files as well as some useful features and shortcuts like Alt + Shift + D for a preview of the compiled JavaScript and Alt + Shift + R to run the file in the console.
Once installed, you might have to edit some of the package’s preferences if your Node and Coffee binaries aren’t installed in the standard directories. To do so, open the menu Sublime Text → Preferences → Package Settings → Better CoffeeScript → Settings → User and add the following key, replacing those path with your correct installation folders:
{
  "envPATH": "/path/to/node/directory:/path/to/coffee/directory"
}
Once you have this package installed you’ll need inline linting and error feedback for CoffeeScript files.
Sublime Linter
- Package name: SublimeLinter
- Link: https://sublime.wbond.net/packages/SublimeLinter
This is the linter package itself, which comes with support for a few basic languages and doesn’t require any special preferences to work (although you can provide some for a more customized experience).
Sublime Linter - Coffee
- Package name: SublimeLinter-coffee
- Link: https://sublime.wbond.net/packages/SublimeLinter-coffee
This is the CoffeeScript sub-package for the linter, which uses CoffeeLint to show lint warnings and errors for your code. This package requires you to add the install path of CoffeeScript and Node to Sublime’s User Preference file. (Note that your install directories might differ from mine.)
{
  "coffee_path": "/usr/local/lib/node_modules/coffee-script/bin",
  "node_path": "/usr/local/bin"
}
The linter will look for any coffeelint.json configuration file within the root folder, and you can toggle the linter on and off in the command palette (Cmd/Ctrl + Shift + P) via SublimeLinter: Toggle Linter.
Useful Preference Settings
Here are some optional but useful preferences for Sublime that will help speed up CoffeeScript development. You can add them to your Preferences → User file.
Autocomplete triggers: Wether or not you’re using a custom autocomplete package or not, you might want to add @ and . as triggers for autocompletion:
{
  "auto_complete_triggers":
  [
    {
      "characters": ".@",
      "selector": "source.coffee, source.litcoffee, source.coffee.md"
    }
  ]
}
Ensure consistent indentation: Since indentation is so critical in CoffeeScript, I’d suggest enforcing the same indentation type on all your files. Our standard is 2 spaces:
{
  "tab_size": 2,
  "translate_tabs_to_spaces": true
}
Checking in extraneous whitespace clogs up diffs, so I use some more settings to help with code consistency:
{
  "trim_trailing_white_space_on_save": true,
  "ensure_newline_at_eof_on_save": true
}
Finally, I have some not-so-specific preferences that makes my life easier. Some of these are self-explanatory or are documented in the Unofficial Sublime Documentation, but some are undocumented:
{
  "scroll_past_end": true,
  "show_full_path": true,
  "highlight_line": true,
  "highlight_modified_tabs": true,
  "find_selected_text": true,
  "fold_buttons": false,
  "enable_tab_scrolling": false,
  "bold_folder_labels": true
}
Most of these are optional, but after more than two years working with Sublime now, I found these to be extremely valuable to make the workspace cleaner and easier to parse.
Theme and Color Scheme
I’m often asked what color scheme I use. It’s Soda Dark 3 in combination with Monokai (SL), and I use Envy Code R as my programming font.
If you’re writing CoffeeSript with Sublime Text, I hope this helps!
blog comments powered by Disqus